
This book provides a comprehensive overview of the fundamentals of wood turnings, and also includes examples from some top turners around the globe. Keeling also covers the evolution of segmented wood turning technology, as well safety and health concerns when working with wood. The book includes 10 projects, which progress in difficulty, as well as a gallery of inspirational segmented designs. Although the book is meant to educate beginners about segmented turns, it's not designed to be a complete resource for those wanting to create the best-looking turniments.
Techniques
In Techniques for Segmented Wood Turnings, William Smith provides step-by-step instructions for making segmented turned objects. This woodworking method is highly effective for producing complex vessels with intricate details. This method is especially well-suited to beginners. You should be familiar with basic woodworking skills before you begin. You should have some experience in the art of turning. After mastering the basics, you can move on to more advanced techniques.
Materials
There are many options for creating segmented woodturns. These can be made using stave or ring construction. Wood expands in a direction parallel to the grain. Therefore, the turner must take into account non-parallel directions of grain and take precautions to protect the piece. This book will teach you the basics and introduce you to the many different styles and types of wood turning.
Feature Rings
Many segmented bowls have a feature called a Feature Ring. The segmented bowl's ring is created by the lightning-like design of the zigzag element turning on its sides. The finished turning can be sanded to 600grit then filled with clear laquer. These ring shapes can be used as home decor items or gifts. This 120-minute DVD will show you how to make segmented jars.
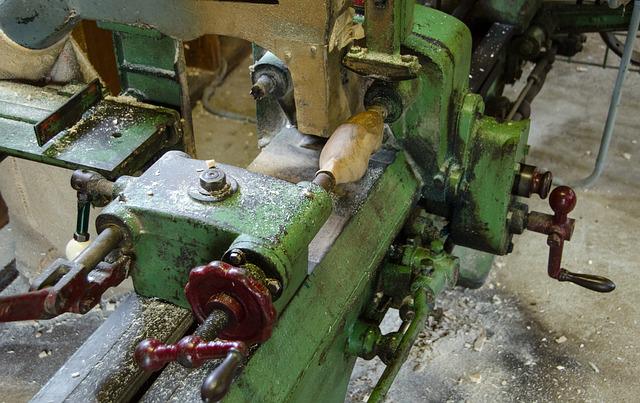
Ring construction
There are many ways to create rings for segmented wooden turnings. This technique is also applicable to solid non-segmented lumber. Wood expands perpendicularly to its moisture content and grain. The shape of the ring may be affected if the grain is not parallel. Therefore, the turner must account for this when designing the segmented turned.
Stave construction
Segmented wood turning can be done in two main styles: ring or stave. The most common style is the ring, while some projects may require stave. Although both styles have their advantages, ring construction may be easier to master and more appealing for beginners. This article will help you understand the differences between ring- and stave-construction and how to use them in your next segmented project.
Solid wood
Precision of miter angles are crucial when turning solid wood segments. Segments may vary in size depending on the size and shape of the ring. PVA wood glue is required to attach segments. Pairs of segments may be glued together at once. To hold them together, clamping rings can be used with hose clamps. Each eight segment should have a miter angle at 22.5 degrees.
Floating base
Segmented wood turnings should not be made with a flat base. A floating base is a way to prevent base failure and minimize stress on the piece. Floating bases can also be made from a semi-mortise joint. A solid disc fits into the gap and allows for wood movement. Floating bases are also very stable, especially when using quarter-sawn lumber instead of plain-sawn. A floating base should be no larger than 6 inches in size.
FAQ
What woods can be used to make furniture?
Woods are classified based on their hardness. Softwoods are pine, cedar and cypress. Because they resist rot, softwoods can be used to make outdoor furniture. The hardwoods are oak, maple and mahogany. Because they are not weather-resistant, they are best used indoors.
Can this be a way to make money?
Yes! Many woodworkers do. According to U.S. Bureau of Labor Statistics (BLS), woodworkers earned a median annual salary of $34,000 in May 2012. This is significantly higher than the national average, which is $31,000 per year.
How much will it cost to get started?
Because every project is unique, there aren't exact numbers. Here are some factors to help you estimate how much money you will need.
-
Material costs
-
Tools and equipment
-
Time spent working on the project
-
Your hourly rate
-
What amount of profit can you expect to make?
-
Whether you plan to hire help
Start small, if possible. You can make simple boxes or picture frames if you're just getting started. You'll become more proficient as you get experience.
How much should a hobbyist invest to get started?
It is likely that you will need some capital in order to buy the required tools and supplies if your goal is to open your own woodworking business. You can start by purchasing a small table saw and drill press as well as a circular saw, circular saw, jigsaw and sanding machines. These items aren’t too expensive so you won’t have to break the bank.
What kind of wood should you use?
The most commonly used woods for woodworking are oak, maple, cherry. Each wood type has its own characteristics which affect the final product's appearance and feel. For example, oak tends to be darker and harder than other woods. Birch, which is lighter and soft, is more heavy than mahogany. There are two options: solid wood and veneers. Veneers consist of thin sheets made from wood and glued together to form a single layer.
Statistics
- Overall employment of woodworkers is projected to grow 8 percent from 2020 to 2030, about as fast as the average for all occupations. (bls.gov)
- If your lumber isn't as dry as you would like when you purchase it (over 22% in Glen Huey's opinion…probably over 10-15% in my opinion), then it's a good idea to let it acclimate to your workshop for a couple of weeks. (woodandshop.com)
- The best-paid 10 percent make $76,000, while the lowest-paid 10 percent make $34,000. (zippia.com)
- In 2014, there were just over 237,000 jobs for all woodworkers, with other wood product manufacturing employing 23 percent; wood kitchen cabinets and countertop manufacturing employing 21 percent. (theartcareerproject.com)
External Links
How To
How to join two pieces of wood together without nails
Woodworking is a popular hobby. Woodworking is a relaxing hobby that allows you to use your hands to create useful things from wood. You might want to join two pieces from the same wood, but you don't need to use nails. This article will help you to maintain the beauty of your woodwork projects.
The first thing you'll need to do is cut off any rough edges from your pieces of wood before joining them together. Avoid leaving sharp edges that could lead to problems later. Now you can start gluing the boards together.
If you are working on hardwood, you should only use glue on one side. You should glue both sides if you are working with softwoods such as pine and cedar. Once the glue has dried, press the boards together until they are fully adhered. Before moving onto the next step, make sure the glue has dried completely.
After you've glued your boards, you'll want to drill holes into the joints where you plan to insert screws. These holes will differ depending on the type and size of screw you are using. If you plan to use a 1/2 inch wood screw, drill a hole at least 3/4 inches in depth.
After drilling the holes, you can drive the screws into your board's backside. Do not hit the boards' front surfaces. It will ruin the finish. When driving the screws, try to avoid hitting the ends of the screws too much. This will avoid splitting in the wood's ends grain.
You'll need to protect your completed project from the elements. You have two options: seal the whole furniture piece or just the top. You want it to last years, so you can use any product. Some examples include oil-based varnishes, polyurethane, shellac, lacquer, etc.
These products can be found in most home improvement shops. Just make sure that you buy the right kind for the job. Keep in mind that certain finishes can be toxic and should not be used indoors. Always wear protective gear when handling any of these finishes.