There are many online videos that show woodcarving. People enjoy watching Ian's videos because they show the techniques step by step. Ian's videos come in downloadable video files. These videos also include plans and photos. All purchasers must be in a position to view MPG videos. Aside from his videos, he has books that can teach you how carve various materials. Ian Norbury's Fundamentals of Woodcarving is an example.
Fundamentals of Woodcarving
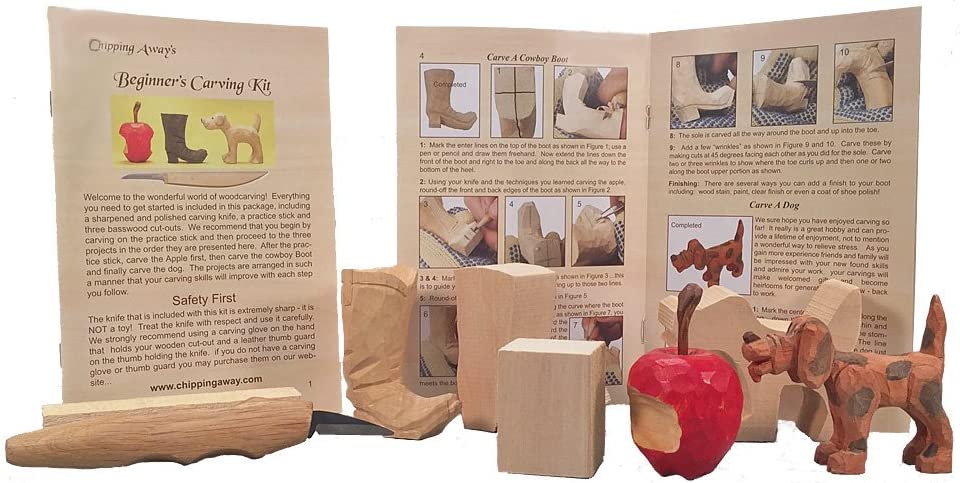
Consider taking a beginner's woodcarving class. This class will help you learn the fundamentals of carving. It is tailored to your level of experience. You will learn about safety, tools, wood, finishes, and the fundamentals of woodcarving before diving into more advanced techniques. The class will cover carving a human face, an eagle or Christmas ornament. Also, you'll learn about the grain direction of wood and creative ways to remove it cleanly.
A woodcarving class is a great way to learn if you are interested in carving flowers or fruits. If you have a talent for the craft, it will not be difficult to learn the basics. Whatever your level of experience, you'll be able to learn the techniques and design process within a relaxed environment. A woodcarver who has spent thirty years learning the craft can tell you that the foundation of woodcarving is to find a teacher who can teach you to be a master.
Ian Norbury
Ian Norbury's woodcarving videos are like peering over the shoulder at a master carver. Each video shows you the steps and demonstrates the techniques that Ian Norbury has mastered over fifty years of woodcarving. These videos, which include his detailed instruction, are available for free and come with a 30-day money-back warranty. You can download them at any time and watch them as many times as you need.
You can use the DVD as a guide or training tool. The videos offer step-bystep instructions as well clips of Ian Carving. You can view the entire process from beginning to end. Ian's teaching methods are easy to understand. He shows how to carve an harlequin and how to draw a character out of a myth. There are over 2 hours of instructional videos, which can each help you to improve your technique.
Frank Russell
Frank Russell's woodcarving videos are great for beginners or intermediate carvers. His techniques include woodcarving animals and birds as well as plants. He also shows how to shape and clean bits. The videos cover the actual process of carving, as well as visual concepts. Frank Russell's videos also can be streamed online or on DVD. If you're looking for a comprehensive guide to carving birds and other animals, Fur, Feathers, and Fins are ideal.
Frank Russell's videos on woodcarving are great resources for both beginning and advanced carvers. These videos have detailed instructions for both beginners and advanced carvers. They were filmed using Foredom Woodcarving Kits. A Cotton Tail Rabbit carving video is also included in the series.
Scott Phillips
If you're looking for more information on woodcarving, you may want to watch Scott Phillips woodcarving videos. Scott and his woodcarving skills are featured in the PBS series "American Woodshop." He shares about his first woodcarving encounter, using his father's costly walnut boards. Scott also talks about how his love for baseball inspired the creation of his first decorative jewelry container. Scott's woodcarving videos are not the only ones he has made. Scott also wrote a book on shuttle history. Scott will also be chronicling the history in his book "Remove Before Flight." His woodcarving business has taken off but he still builds Adirondack chairs, clocks, and other furniture.
Kevin Coates
Kevin Coates makes woodcarving videos. He has over seven million YouTube views and nearly 26,000 subscribers. Many other woodcarvers have taken inspiration from his videos and created their own woodcarving videos. You can watch them to see how you can carve your own piece. These videos show carvings by Kevin Coates, as well as other well-known carvers. You won't find better carving videos than these.
FAQ
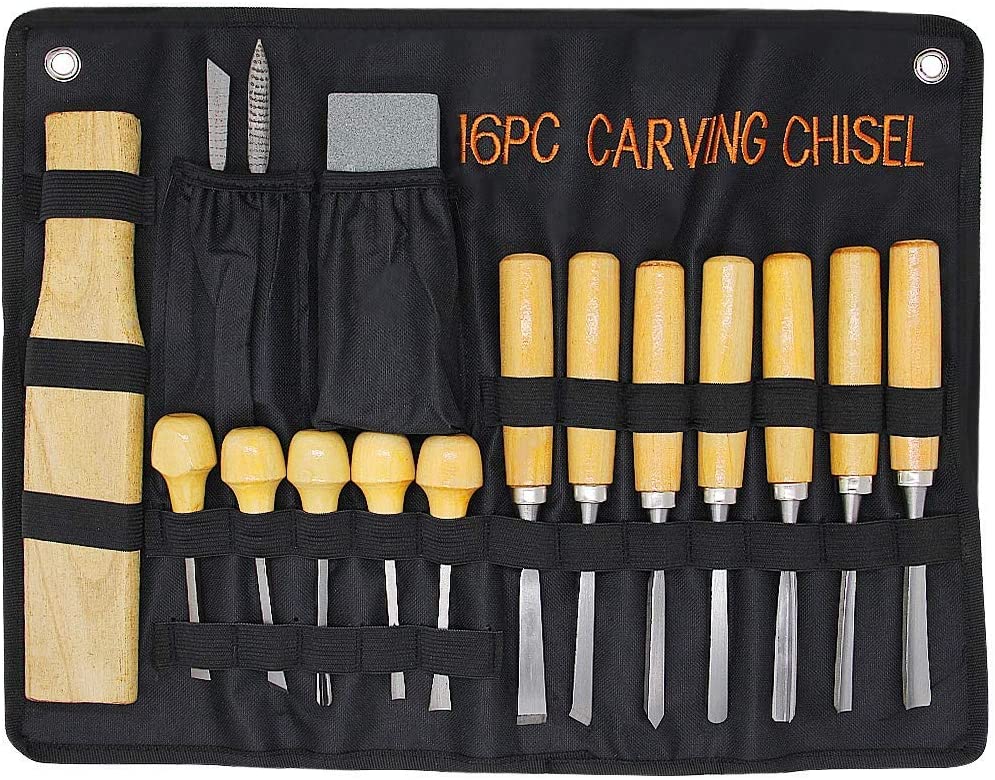
What tools should I start with when becoming a woodworker?
Woodworking is an art that takes patience and practice. It takes time to master all the tools and techniques involved in woodworking.
There are many kinds of woodworking equipment currently on the marketplace. Some prefer power tools while some prefer hand tools.
The choice is yours, but you must ensure you choose the right tool for the job. If you don't have any experience, you may consider starting with a basic set of hand tools.
Another option is to learn how to use a router, which is used for cutting intricate shapes into wood. These can be found at most hardware shops.
What kind of wood should you use?
The most popular types of wood used in woodworking include oak, pine, birch, maple, cherry, mahogany, teak, poplar, redwood, and bamboo. Every type of wood is different and can have a unique look and feel that will affect the final product. Oak is a darker wood and tends to be more durable than other types. Birch is soft and light, and mahogany is denseer and heavier. You also have the option of solid wood or veneers. Veneers can be described as thin sheets of wood that have been glued together in one layer.
What is the difference between a hobbyist or a professional woodworker, and how can you tell?
Hobbyists enjoy creating things out of wood. Professionals tend to focus on the quality. Hobbyists tend to take pride and share their creations with family and friends. Professionals spend hours researching design ideas before starting to work on a project. They'll pay great attention to details, from choosing the most suitable materials to finishing the work perfectly.
Is it possible to refinish your own furniture?
Yes! There are many options for refinishing furniture that you don't need to hire a professional. Here are some ideas:
Use sandpaper for removing stains and scratches. After that, use a clean towel to wipe the surface.
Apply clear polyurethane varnish. Allow furniture to dry completely before you move it around.
Paint furniture with acrylic paint.
Instead of using paint, stain is a better choice. The furniture will get a rich look with the stain.
Shellac wax can be applied. The wax will add shine to the wood and protect it.
Statistics
- Woodworkers on the lower end of that spectrum, the bottom 10% to be exact, make roughly $24,000 a year, while the top 10% makes $108,000. (zippia.com)
- The best-paid 10 percent make $76,000, while the lowest-paid 10 percent make $34,000. (zippia.com)
- In 2014, there were just over 237,000 jobs for all woodworkers, with other wood product manufacturing employing 23 percent; wood kitchen cabinets and countertop manufacturing employing 21 percent. (theartcareerproject.com)
- If your lumber isn't as dry as you would like when you purchase it (over 22% in Glen Huey's opinion…probably over 10-15% in my opinion), then it's a good idea to let it acclimate to your workshop for a couple of weeks. (woodandshop.com)
External Links
How To
How to stain wood
The process of staining wood involves the application of chemicals to the wood's surface, which causes it to change its color. This chemical reaction causes the wood color to change from white and brownish red. Oak is the most commonly used wood for staining, but other woods can also be stained.
There are many methods to apply stain to wood surfaces. Some methods include mixing the stain along with a solvent like turpentine and then applying the mixture to the wood by brushing or spraying. Some methods involve a mixture of water and dye that is applied directly to the wood. You can also mix stains with varnishes or paints so that they become part the finish coating.
Preparing your wood for staining is the first thing to do. Clean the wood to get rid of any grease, dirt or other substances that might be detrimental to the stain's application. Sanding the wood smooths out rough spots and scratches. The next step is to determine the type of stain you would like to use. There are two main types of stain: non-penetrating and penetrating. Penetrating stain penetrates deeper into wood than nonpenetrating, making them suitable for dark colors like mahogany. The best non-penetrating colors are those that work with light colors like maple.
Once you have decided on the stain type that you want, get your tools ready. A paintbrush works well for applying stains because it allows you to spread the liquid evenly across the surface. A few rags are also handy to clean up any spillages after you have finished painting. If you are planning to mix your stain, ensure you have enough containers for each component.
After you have prepared your materials for staining, clean the area. You can remove grime and dirt with warm water and soap. You can wipe down the entire furniture using a damp rag with clean water. If you intend to stain darker wood, make sure you get rid of any debris.
Next, spray the stain. Begin at one end and spray or brush the stain on the wood. Work slowly and carefully, moving back and forth along the grain of the wood until you reach the opposite end. Keep the stain from dripping off the wood's surface. Before moving on to the next steps, allow the stain drying completely.
To protect the painted surface, apply a coat of clear polyurethane sealant. Three coats of polyurethane sealing agent are required. Allow the third coat, which should dry overnight, to dry before sanding.