You can now take a woodturning class if you've ever wanted to make your own spoons and bowls. Mesa County Libraries offers a "Learn About Woodturning” course for the community. Grand Valley Woodturners member Instructor Buck Taylor will be teaching participants the basics of woodturning and the tools required to make them. He will also discuss the basics of woodworking, and the different types of wood as well as the tools that are used to make them.
Basics of woodturning
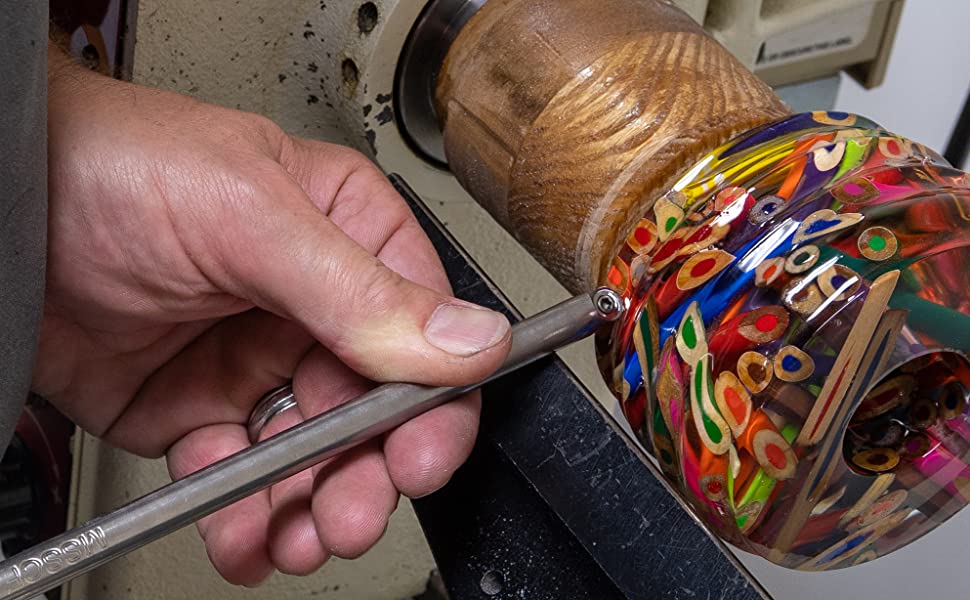
Woodturning allows you to do what you want. It is possible to come up with something completely new from the original plan. Woodturning is a very rewarding skill, which allows you to make decisions as you go. Woodturning offers a freedom that allows you to create wood pieces in almost any shape or design that you desire, something that is not offered by most woodworking disciplines. You can turn amazing masterpieces by following these simple guidelines.
Before you can begin woodturning you need to be familiar with the equipment required. A lathe, wood shaping tools, sharpening tools, and safety goggles are essential for the project. These tools are not expensive or difficult to find. Many beginners build their own lathes with a power drill. For accurate turning the wood, it is important to determine the diameter and speed of the pulleys.
Techniques
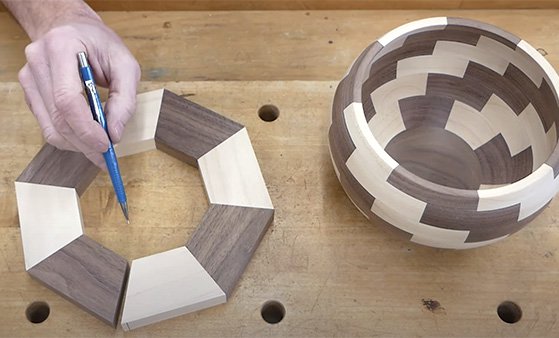
A wood turning class will show you how to turn beautiful bowls from selecting the right logs to sanding the techniques. You'll also learn to chainsaw logs, and how to turn bowls with natural edges. You'll also learn how to make unique designs and enhance your bowls using different tools. The techniques taught in wood turning classes will allow you to create beautiful bowls, no matter how experienced or beginner you are.
The first Techniques for Wood Turning Class will teach you the fundamentals of woodturning. You will learn how to turn small bowls and spindles. Learn about tools and wood for turning, how you can choose the best kind of wood, how to sharpen them, and more. You'll leave the class with a cutting board that's endgrain, a finished bowl, and even a piece of end grain wood.
Tools

There are many different types of woodturning tools you can choose from. If you are a beginner, consider taking a woodturning class. You'll learn everything you need to know about woodturning, as well as how to choose the right tool. The instructor will show you how to safely use a lathe. You'll also learn about tool angles, chucking and other details. It will be a lot of fun to use the lathe so that you can start practicing your skills immediately.
Different techniques require different types of tools. Carbide tools can be used for small projects. They are also less expensive than traditional HSS tools. Carbide tools are perfect for turning pen blanks or small bowls. Carbide tools can be used to help you understand the basics of woodturning while being inexpensive. This tool will help you make the highest quality products. Wikipedia has a great article that explains how to turn wood into tools.
The best places to take a class on wood turning
There are many different places to take a wood-turning class. You can either take one lesson or a course that lasts a whole day. Or you could do both. You will learn new skills and leave class with a completed shallow cherry bowl. Below are some suggestions to help you choose the right class. The best places to take a wood-turning class depend on what you're interested in learning.
In general, woodturning classes are tailored to fit the needs of the individual student. Whether you're interested in one-on-one tuition or a group lesson, you'll be guided through the process step-by-step. One-day classes will teach you everything you need to know, including how to use a lathe, sharpen tools, and turn an object. You can even learn how to apply food-safe finishes to your finished work in some classes.
FAQ
Are there any tips for starting a woodworking enterprise?
Starting a woodworking business is a lot of work. It's worth it if you're passionate and willing to work hard. You'll likely enjoy the challenge of owning your business.
When you are launching a new venture, it is important to be aware of the possibility that you will encounter unexpected difficulties. For instance, you might run out of money unexpectedly. You might find customers not willing to pay the amount you expected. These situations are necessary for survival.
It is a good idea to create a separate bank account just for your company. You will always know how much money you have coming in.
Can I refinish furniture that I make?
Yes! There are plenty of ways to refinish old pieces of furniture without having to pay a pro. Here are some ideas:
To remove stains and scratches, use sandpaper. Finally, use a clean cloth or sponge to clean the surface.
Apply clear polyurethane paint. Let dry completely before moving furniture around.
Paint furniture with acrylic paint.
Stain can be used instead of paint. The furniture will have a rich look thanks to the stain.
Shellac wax is applied. The wax will add shine to the wood and protect it.
What tools work best for me?
It's important to consider your preferences and needs when buying tools. Do you prefer metal or plastic handles? What size screws and nails do you use most often? Are you comfortable with power tools, or would you rather use hand tools?
How do you calculate woodworking prices?
When calculating the costs of any project, it is important to keep them as low and affordable as possible. You should always try to make sure that you are getting the best deal on materials. Also, consider all other factors that can affect the price of your projects such as skill level, experience, time and cost. To get an idea about the average cost for common household DIY tasks, see our guide to the average woodwork project price.
Statistics
- Overall employment of woodworkers is projected to grow 8 percent from 2020 to 2030, about as fast as the average for all occupations. (bls.gov)
- The best-paid 10 percent make $76,000, while the lowest-paid 10 percent make $34,000. (zippia.com)
- In 2014, there were just over 237,000 jobs for all woodworkers, with other wood product manufacturing employing 23 percent; wood kitchen cabinets and countertop manufacturing employing 21 percent. (theartcareerproject.com)
- Average lumber prices rose about 600 percent between April 2020 and May 2021. (familyhandyman.com)
External Links
How To
How to make wooden joints
This tutorial will help you join two pieces of wooden together. We'll use the "pocket hole joint," which means we drill holes in the wood and then glue them together. If your wood is straight and flat, this method will work well. Try dowel joinery instead if your wood doesn't look straight. Here are the steps
-
Drill Pocket Hole Joints. You will need to measure and mark the exact location of your pocket hole joint. Then drill 3/4 inch deep holes into the ends of each piece of wood using a jig saw or handheld drilling machine.
-
Sand Smooth. Sanding the wood's edges will ensure that the joint doesn't split.
-
Glue Together. Apply glue on both sides of the wooden plank. Allow it to sit for approximately 5 minutes before you clamp the pieces together.
-
Clamp the Pieces Together. After the glue has dried properly, clamp the pieces together to make sure they are flush.
-
Trim Joinery. Trim the excess wood around the joint after the glue has dried completely.
You should leave enough space between the pieces to allow you to turn them inside-out.