The classes at your local college may be a good option if you are interested in making ornaments. Woodturning is just one of the many crafts you have to choose from. Woodturning can transform a wooden spoon or bowl into a Christmas ornament. Here are some tips for beginners. The first step is to find a craft class you enjoy. If you love intricate woodturning designs, woodturning could be the right choice.
Dale L. Nish
Dale L. Nish was one of the most important woodturners in the United States. He has been teaching the art and demonstrating it to people for over 40 years. Woodturning and Ray Allen is the latest in a series of books on this topic. Other books written by Dale L. Nish include Creative Woodturning, Artistic Woodturning, and Mastering the Art of Woodturning.
Dale L. Nish presents step-by-step instructions for making woodturned Christmas ornaments. This comprehensive guide contains color photos, detailed plans, and expert tips about using templates. This book features woodturning experts' ornament ideas. This book is essential to anyone looking to create stunning wooden ornaments this holiday season.
Dick Sing
Dick Sing's book provides step-by, detailed instructions on how to create different kinds of wooden ornaments. Throughout the book, he offers a variety of color photos to guide you through each project, as well as helpful tips for selecting the right woods and using the tools correctly. You'll also get lots of ideas for Christmas gifts and dozens of woodturning ornaments that make great gifts for everyone on your list.
Dick began demonstrations at Racine woodcuts as an aspiring turner. His first demonstration brought about a lot of sweat underneath his lathe. Soon Dick was receiving requests to demonstrate at craft shows, festivals, and craft shops across the country. Even a California craft club called him. The rest is history. Dick Sing has been teaching and demonstrating woodturning since 1989. He has also written nine books about the subject. Private lessons are available.
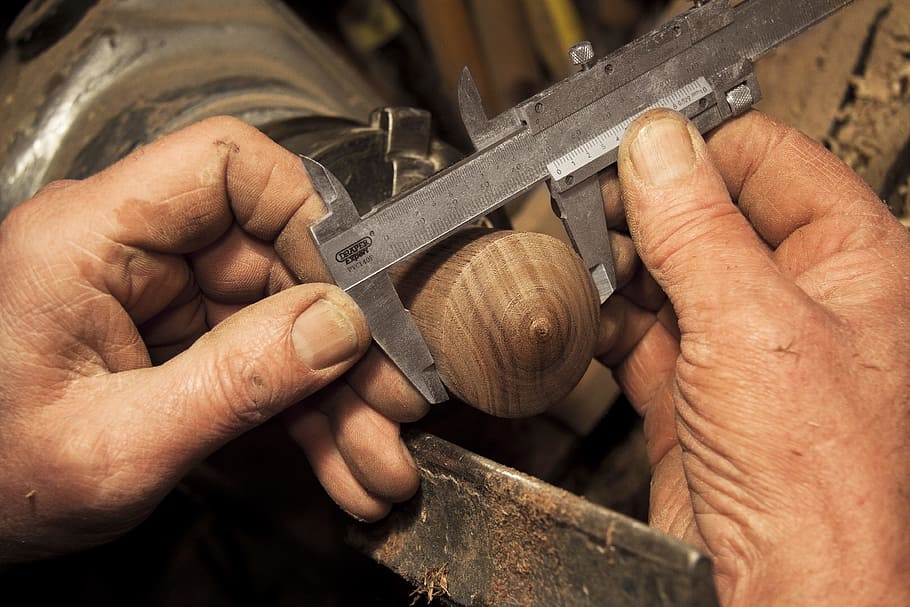
Acacia trio

Acacia trio woodturning ornaments is made from real sea-urchin shells and turned ivory finials. Each piece measures approximately 7 inches long and hangs on a monofilament. You will need a drill, sandpaper, acrylic paint, and a handsaw to make each ornament. Begin by measuring the width you wish to make the ornament. Then mark the centre with a square. Next, slide a spur against the spindle. Once you have the wood in place, turn the lathe. Use a roughing tool to turn the wood. Next, use a parting knife to finish the job and add details to the ornaments.
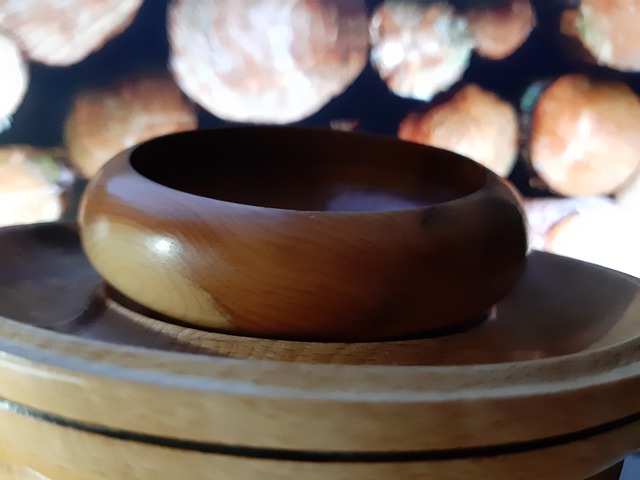
Sputnik
Sputnik Sea Urchin handturned decorations make unique gifts that will last years. It features distinctive protrusions shaped like horns that will be noticed by the recipient. The shell has been crafted to fit the finial. It can be made from maple, bloodwood or other wood and is coated with protective spray clear enamel. These ornaments, which are space-themed, are suitable for all occasions and make great conversation pieces.
Visit the Met Opera Shop for wooden ornaments inspired from Sputnik chandeliers. Each ornament is 3-1/2 inches wide and comes with an elegant gold ribbon. You can purchase one or all three ornaments. For maximum protection, you can purchase one of the four sets with four ornaments that are Sputnik-themed. They will be sent flat-rate USPS Priority Mail.
Acacia trio by Dale L. Nish
Dale L. Nish is an international speaker and author who has had a profound impact for almost three decades on the woodturning world. He has presented his work at more than 200 events and published numerous articles. He shares his top tips, as well as a gallery of ornament-turners' work, in this article.
Acacia trio by Dick Sing
This book includes step-by-step instructions with color photos that show you how to make Acacia trio woodturning ornaments. This book also includes tips for beginning woodturners, such as selecting the right wood for the project and using appropriate tools. It also includes a tutorial for making hollow, carved wooden eggs. You can order a copy today to learn how to create these unique ornaments.
FAQ
How much does a hobbyist need to invest in getting started?
You will need capital to purchase the tools and supplies you need to start your woodworking business. Start by getting a small circular saw saw, drill press or circular saw. These items don't cost much so they won't break your budget.
How do I get started as a woodworker?
Woodworking is an art that takes patience and practice. Learning how to use the various tools and techniques necessary for woodworking takes patience.
There are many kinds of woodworking equipment currently on the marketplace. Some people prefer to use power tools while others prefer manual tools.
Your choice, however, is up to you. However, you need to ensure that the tool you use is the right one for the job. Start with a basic set if you don’t have any previous experience.
A router is a tool that cuts intricate shapes in wood. You can also learn how to use it. You can find these at most hardware stores.
Is there a way to start my own woodworking company?
It's not easy to start your own woodworking business. You will need to adhere to many legal requirements. This doesn't necessarily mean that you should go through all the work of setting up a company. Many people choose to join existing businesses. This allows you to join existing businesses and pay only membership fees.
What wooden items sell well?
The most successful wooden items are made from sustainable wood.
The most used wood types for furniture are oak, maple and walnut.
These woods are strong and durable, with beautiful grain patterns. If they are well cared for, they can last many years.
To prevent moisture damage, wood furniture should always first be painted. This includes all surfaces, including drawers, doors, and handles.
Paint that is water-resistant will ensure furniture lasts for a long time.
It is recommended to use an oil-based primer, then apply two coats. You may need to apply several coats of top coat depending on how much wear it is expected.
Avoid spray cans and aerosol paints. These products are contaminated with solvents, which evaporate rapidly and can leave behind toxic fumes.
How often should new supplies be purchased?
You'll probably have to replace some of your tools over time. You'll need to sharpen your hand tools regularly if you use them. And if you're using power tools, you'll need replacement parts periodically. To avoid buying too much at once, try to spread your purchases out over a few months.
Statistics
- Average lumber prices rose about 600 percent between April 2020 and May 2021. (familyhandyman.com)
- Overall employment of woodworkers is projected to grow 8 percent from 2020 to 2030, about as fast as the average for all occupations. (bls.gov)
- The best-paid 10 percent make $76,000, while the lowest-paid 10 percent make $34,000. (zippia.com)
- In 2014, there were just over 237,000 jobs for all woodworkers, with other wood product manufacturing employing 23 percent; wood kitchen cabinets and countertop manufacturing employing 21 percent. (theartcareerproject.com)
External Links
How To
How to join two pieces of wood together without nails
Woodworking is a hobby that many people enjoy doing. Woodworking can be a fun hobby because you can work with your hands to make useful objects from wood. However, there are times when you want to join two pieces of wood together without having to use nails. This article will teach you how to do this to keep your woodwork projects looking great.
Before you can join the wood pieces together, you need to remove any rough edges. Sharp corners can cause problems down the line. Now it's time to start glueing your boards together.
If you're working with hardwood, you should only apply glue to one side. You should glue both sides if you are working with softwoods such as pine and cedar. After applying the glue, press the boards firmly until they are completely stuck together. Before moving onto the next step, make sure the glue has dried completely.
Once you've glued your boards together you will need to drill holes in the joints to accommodate screws. You can choose the type of screw to determine the size of your holes. If you are going to use a half-inch wood screw, you will need to drill at least 3/4 inch deep.
Once you have drilled your holes you will need to drive the screws through each joint and into the backside. Do not hit the boards' front surfaces. It will ruin the finish. Be careful not to drive the screws too hard at the ends. This will prevent the wood from splitting.
You'll need to protect your completed project from the elements. You can either seal the entire piece of furniture or cover the top. You want it to last years, so you can use any product. Examples include oil-based varnishes and polyurethanes, shellac, lacquer and others.
These products can generally be found in any home improvement shop. Be sure to choose the right one for your project. Keep in mind that certain finishes can be toxic and should not be used indoors. Wear protective gear whenever you are handling them.