
These are the steps that you need to take when installing a facial plate. These include selecting the right dimensions, screw sizes, and material. Once you have these details down, it is time for your faceplate to be installed. Continue reading to learn how you can install your faceplate. It will be easy to install and will help your lathe function as expected. These are the steps required to install a faceplate.
Dimensions
Faceplates are a primitive accessory that can hold almost any shape and with great accuracy. Faceplates can be made out of temporary or light alloys. These faceplates have a limited use and are suitable for workholding duties that require a lot of effort. Wood screws can be used to attach the workpiece to a wooden faceplate. This arrangement is much more common in industrial lathes than in home workshops.
It is important to measure the faceplate. The dimensions of the faceplate must be identical to the blank. It is important that the screws do not conflict if you plan to use it for multiple purposes. The faceplate should have a hole to hold a wrench. A slot for a tommybar or a wrench should be included. For each tool, it is possible to browse the faceplate.
Material
Face plates for lathes can be made from a variety of materials including aluminum, cast iron and steel as well as welded structures. When designing a faceplate, it is important to consider the properties of different materials. These are some of the considerations that should be taken into account when choosing a material to be used for a faceplate. To ensure durability and accuracy in design, you must consider the material properties. It is important to optimize cost by choosing the right materials for your faceplate.
A lathe faceplate is typically made from polymeric material. It features a cylindrical design. It usually has indicia marks and a planar front. There are also recesses for the workpiece to be chuck. Some faceplates come with fasteners that are located in inserts that are a contrasting color. This serves as a warning to the user in case a fastener is loose.
Screw size

A wood lathe may require you to use a different type of screw than usual. This is because the screw size determines how much space is available for the threads. If you use a bigger screw diameter, the screw will protrude from the faceplate and can cause damage. A slightly concave faceplate may be an option depending on the size of your lathe.
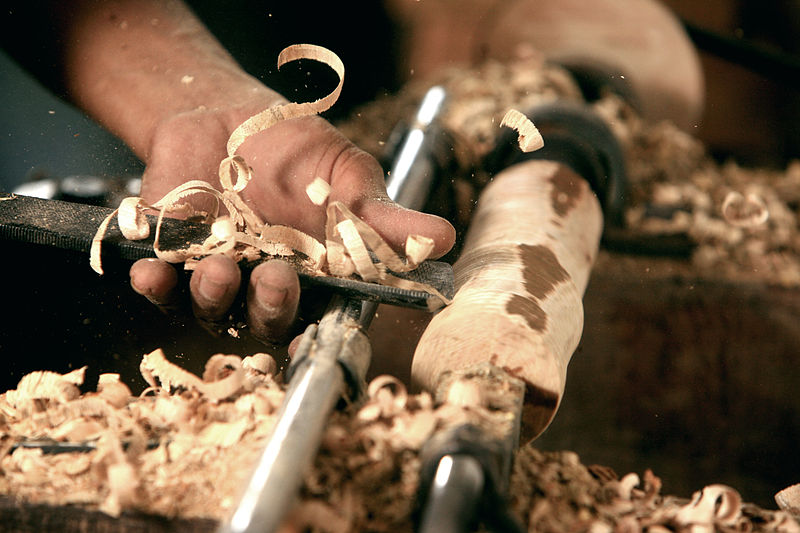
There are many options for faceplates, including steel or alloy. The smaller versions can be made of an alloy, while larger ones can be made from steel. The alloy faces can get worn over time and lead to dangerous situations. Expert turners are familiar with how to mount the blanks so they do not become loose. This prevents them from being able to be turned. However, novices may try to turn blanks that are too large or too close to their tools.
Installation
Before installing the faceplate to your lathe, turn off the power source. Next, mount the faceplate onto your workpiece. Turn the spindle clockwise until the faceplate turns. Once the faceplate is in place, engage the spindle locking mechanism and turn the faceplate clockwise so that it turns freely. You can remove the faceplate by disengaging the spindle lock and turning the lathe counterclockwise to stop it.
A faceplate, a flat, circular, threaded, plate placed on the front of a turning lathe, is called a faceplate. Its slotted surface accepts clamps and other fastening devices. After the workpiece has been placed on the faceplate it can be secured by either sliding the clamps into the slots or directly screwing them into the threads of the faceplate. Once the workpiece is in place, the faceplate can be screwed onto the lathe spindle.
FAQ
How do I organize my shop?
A designated place to store your tools is the first step towards keeping your workshop clean. Make sure your tools are clean and free of debris and dust so they can be used properly. Use pegboard hooks to hang tools and accessories.
What woods are suitable for making furniture?
Woods are classified based on their hardness. Softwoods can be pine, fir or cedar. Because they resist rot, softwoods can be used to make outdoor furniture. The hardwoods are oak, maple and mahogany. They can't withstand the elements outside so they're best kept indoors.
What amount of money do I need to get started with my business?
There are no exact numbers because every project is different. Consider these factors if you need to estimate the amount of money that you will require.
-
Cost of materials
-
Tools and equipment
-
Time spent working on this project
-
Hourly rate
-
How much profit do you expect to earn
-
Whether you plan to hire help
For those just beginning, it may be a good idea to start small with simple items like boxes and picture frames. As you gain experience, you'll be able to tackle more complex projects.
Statistics
- If your lumber isn't as dry as you would like when you purchase it (over 22% in Glen Huey's opinion…probably over 10-15% in my opinion), then it's a good idea to let it acclimate to your workshop for a couple of weeks. (woodandshop.com)
- In 2014, there were just over 237,000 jobs for all woodworkers, with other wood product manufacturing employing 23 percent; wood kitchen cabinets and countertop manufacturing employing 21 percent. (theartcareerproject.com)
- The best-paid 10 percent make $76,000, while the lowest-paid 10 percent make $34,000. (zippia.com)
- The U.S. Bureau of Labor Statistics (BLS) estimates that the number of jobs for woodworkers will decline by 4% between 2019 and 2029. (indeed.com)
External Links
How To
How to stain hardwood
Staining wood is the process of applying chemicals to the wood's exterior, which alters its color. This chemical reaction causes wood to turn from whiteish to brownish. While oak is the most widely used type of wood for staining purposes, other types of wood are also available.
You can apply wood stains in many different ways. Some methods involve mixing the stain with a solvent (such as turpentine) and then brushing or spraying the mixture onto the wood. Another method involves applying a solution of water to the wood. You can mix stains into varnishes or paints to make them part of your finish coat.
The first step in staining wood is preparing the surface. Cleaning the wood thoroughly removes any dirt or grease that could interfere with applying the stain. Sanding smoothens scratches and rough spots. Then you must decide what kind of stain you want to use. There are two main kinds of stains available: non-penetrating stains and penetrating. Penetrating stain penetrates deeper into wood than nonpenetrating, making them suitable for dark colors like mahogany. Non-penetrating stains work best with light colors like maple.
Once you have decided on the stain type that you want, get your tools ready. Paintbrushes are great for applying stain because they allow you to evenly spread the liquid across the surface. A few rags are also handy to clean up any spillages after you have finished painting. If you plan to mix the stain yourself, make sure you have enough containers available to hold the different components of the mixture.
After you have prepared your materials, clean the area you intend to stain. You can remove grime and dirt with warm water and soap. You can wipe down the entire furniture using a damp rag with clean water. Be sure to get rid of all loose material, especially if staining is planned for darker wood.
Next, spray the stain. Apply the stain by brushing or spraying it onto one side of the furniture. Work slowly and carefully, moving back and forth along the grain of the wood until you reach the opposite end. Be careful not to let the stain drip off the wood's edge. Allow the stain to dry completely before you move on to the next step.
A coat of clear polyurethane sealing agent is applied to protect the paint. Three coats are recommended for polyurethane. Allow the third coat of polyurethane sealer to dry overnight before applying the final coat.