
There are many ways you can carve a gnome. There are some things you should know before carving. This project is both fun and rewarding, in addition to the actual carving. It involves multiple layers and can be a great way of learning how to carve the gnome. There are many different ways you can add creativity and flair to your gnome carve. Listed below are three tips for carving a gnome in wood.
Freehand carving of a gnome
Here are some tips to help you freehand carve a Christmas gnome. You can easily carve a simple gnome using a knife. But, if you need to add detail to the hat or beard, a micro-V-tool is essential. A gnome can be carved in a few hours.
The gnome can be a great tool to show off your ability in freehand carve. These gnomes were once common garden ornaments. They are still in use in many countries. Making a gnome out of wood is a great exercise in skill. It will help you gauge how skilled you are and where you need to work on your craft. It will also be an excellent measuring stick for design, detail, and depth. After mastering the drawing of the gnome, you can start sculpting his features.
Whistle carving is a must-try project for every woodcarver
A whistle is a great project for woodcarvers. A whistle is a simple but useful object that can be carved and can be used to introduce friends and family members to the woodcarving process. There are a few things you must do if your whistle is to be functional. This tutorial will walk you through the process of carving a whistle.
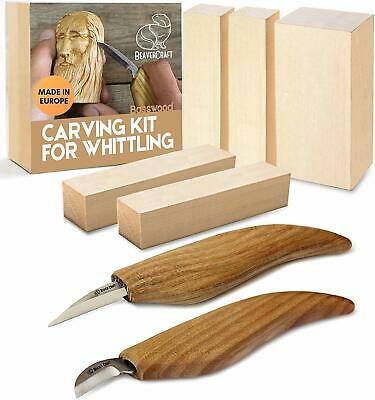
To start the project you'll need a straight-edged, non-toxic knife. Although carving a wooden gnome can seem daunting, this is a very simple project that will improve your woodcarving abilities and provide a great outlet for creativity. It's also one of the best beginner projects, as it will provide you with an opportunity to practice many woodcarving techniques.
Creative gnome carvings: Add creativity
A colorful hat can add creativity to gnome carvings. A wood-carved, gnome can be used as a whimsical decoration or as a sneering troll. Gnomes make a wonderful addition to your garden. This can be done with different materials such as wood or stone.
Making a gnome from wood
When carving a gnome out of wood, the first thing you need to do is determine the size of your wood block. Next, draw the gnome’s anatomy. This includes the face, body (including feet), belt, and hat. You will need to make a V-cut around the facial features to create smooth corners. You can make V cuts using a chisel and/or a knife. Use a micro-V-tool to cut a 1.5mm piece of wood. This will give a nice curved edge that you can use for your hat rim, and beard.
When carving a gnome, you need to keep in mind that it is a beginner-friendly project. Because there are so many opportunities to create high-quality work, Every week, you'll see progress in carving a new gnome. Although it may not be possible with all projects this will make you noticeable improvements in design, shape, facial features, and overall project progress.
Adding a gnome to a world of gnomes
The Gnomes of the Underdark and other RPGs usually have one recurring character: David. This character is not crazy. Telepathy, Can't Argue With Elves, and Speak Fluent Animal are some of his traits. He has the ability to put up road signs and throw people off. David and Lisa may even have an ongoing rivalry.
Gnomes have a powerful ability to cast spells and are very proficient at manipulating arcana. In addition to this, they're the only playable race in the game. Other gnomes have the same skeleton animation, such as the undead, and the leper gnomes. Gnomes have always had a strong presence in Kirin Tor. Meryl, the founding member of the group, had a associate named gnome.
FAQ
How much does a hobbyist need to invest in getting started?
It is likely that you will need some capital in order to buy the required tools and supplies if your goal is to open your own woodworking business. A good place to start would be by buying a small table saw, drill press, circular saw, jigsaw, and sanding machine. These items don't cost much so they won't break your budget.
Where to buy Hardwood Lumber
Home Depot can sell hardwood lumber. They offer a wide range of wood products including flooring, cabinets, furniture and more.
They also have an extensive selection of engineered hardwoods such as Ipe (Araucaria Angustifolia), Brazilian Cherry (Pau d'Arco), and Mahogany (Swietenia Macrophylla).
These woods are available online by searching Google for "hardwood lumber".
What type of tools does a carpenter use?
The most common tool used by carpenters is a hammer. A hammer is useful for driving nails into wood. It is also used to help hold pieces together while working on a job. Other tools include clamps, pliers, screwdrivers, measuring tape, pencils, saws, drills, and wrenches.
How much should a woodworker charge per hour?
Hourly rates for professional woodworkers vary depending on many factors such as skill, experience, availability, geographical location, and other variables.
The hourly average rate for skilled woodworkers runs between $20-$50.
A woodworker with less experience may be able to charge $10 an hour.
How do you calculate woodworking prices?
When calculating the costs of any project, it is important to keep them as low and affordable as possible. It is important to ensure that you are getting the best materials prices. It is also important to consider the costs of other factors, such time, skill, and experience. Check out our guide on the average cost of common DIY projects to get an idea of how much you can spend on woodwork projects.
What tools should you start with to become a woodworker
Woodworking is an art that takes patience and practice. It takes time for you to master the different techniques and tools that are required to woodwork.
There are many types of woodworking equipment on the market today. Some people prefer to use power tools while others prefer manual tools.
While you have the option to pick what you like, it is essential that you get the right tool for the job. It may be a good idea to start with a basic set, if possible, if you don’t know much about hand tools.
You might also consider learning how to use the router to create intricate shapes from wood. These are available at most hardware stores.
Which woods are good to use for furniture-making?
Woods are classified according to their hardness. Softwoods are pine, cedar and cypress. Because they are resistant, they can be used for outdoor furniture. These hardwoods include maple, mahogany and teak. They're generally used indoors because they won't weather well outdoors.
Statistics
- In 2014, there were just over 237,000 jobs for all woodworkers, with other wood product manufacturing employing 23 percent; wood kitchen cabinets and countertop manufacturing employing 21 percent. (theartcareerproject.com)
- Woodworkers on the lower end of that spectrum, the bottom 10% to be exact, make roughly $24,000 a year, while the top 10% makes $108,000. (zippia.com)
- The best-paid 10 percent make $76,000, while the lowest-paid 10 percent make $34,000. (zippia.com)
- Overall employment of woodworkers is projected to grow 8 percent from 2020 to 2030, about as fast as the average for all occupations. (bls.gov)
External Links
How To
How to stain wooden surfaces
Stain wood is a process that involves applying chemicals to the surface of wood, which changes its color. This chemical reaction causes wood to turn from whiteish to brownish. While oak is the most widely used type of wood for staining purposes, other types of wood are also available.
There are many ways to stain wood surfaces. You can mix the stain with a solvent, such as turpentine, and spray it onto the wood. Other methods use a solution of water and dye applied directly to the wood. It is possible to mix stain into varnishes and paints, making it part of the finishing coat.
Preparing your wood for staining is the first thing to do. You must clean the wood well to remove any grease or dirt that might interfere with the application of the stain. Sanding smoothens scratches and rough spots. Next, you need to decide which stain you want. Penetrating stains are different from non-penetrating. Penetrating and non-penetrating wood stains penetrate deeper than other types, making them perfect for dark colors like mahogany. Penetrating stains are best paired with lighter colors, such as maple.
You will need to decide on the type of stain you want to use, and then prepare your tools. A paintbrush works well for applying stains because it allows you to spread the liquid evenly across the surface. It is a good idea to have rags on hand in case you need them to clean up any stains that may remain after you have finished painting. If you are planning to mix your stain, ensure you have enough containers for each component.
After you have prepared the materials, you can clean the area where you want to stain the wood. Use warm water and soap to clean away dirt and dust. Wipe down all furniture pieces with a dampened cloth and clean water. Be sure to get rid of all loose material, especially if staining is planned for darker wood.
Next, apply the stain. The stain can be applied by spraying or brushing the stain onto one end of the furniture. You should work slowly and carefully. Continue moving along the grain until you reach your opposite end. Keep the stain from dripping off the wood's surface. Before you proceed with the next steps, let the stain dry completely.
A coat of clear polyurethane sealing agent is applied to protect the paint. Three coats are recommended for polyurethane. Let the third coat dry overnight before you sand the final coat.